SharePoint
Document Templates

Description

We're not just IT consultants.

Purchase

Choose one of the following ways to purchase the Document Template Tool.

  • Self-install:
    We'll send you the files and instructions and you install them yourself.
  • Auto-install:
    You give us a Site Collection Admin account and we will set it up for you.
  • Assisted-install:
    We'll work with you via phone or video to help you install our solution.
  • Additional customization: contact us
    You give us your requirements and we'll modify the Document Template Tool to suit your special needs.
  • SharePoint consulting: contact us
    This is our favorite! Tell us your problem... & we'll help you solve it!

SharePoint Document Template Tool

Purchase using Square

SharePoint Workflow Tool

Purchase using Square

We save you time

Our SharePoint Document Template tool will save you time and ensure all customers receive identical yet customized documents. Our tool works in the same manner as 'mail merge' but with the ease of use and confidence of SharePoint.

Details

Our Document Template tool is easy to use and intuitive.
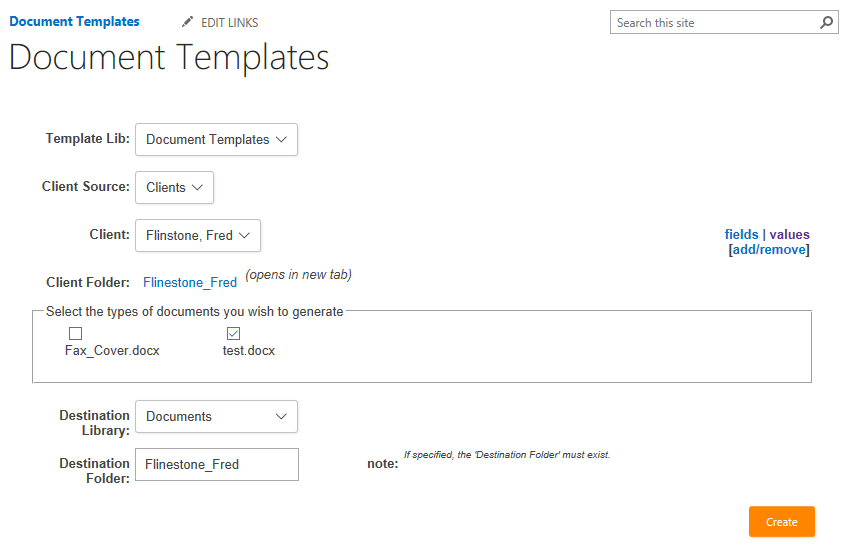
Main Page

Select your Client, Check the templates you want to use & Press "Create". It's that easy. Every time.
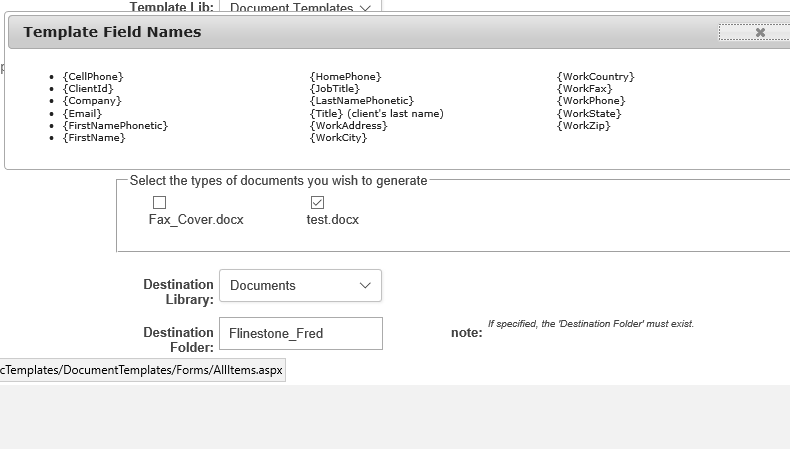
The available tags are shown by clicking 'fields'

You have full control over the {tags} you want to use. You can create up to 276 {tags} of your chosing.
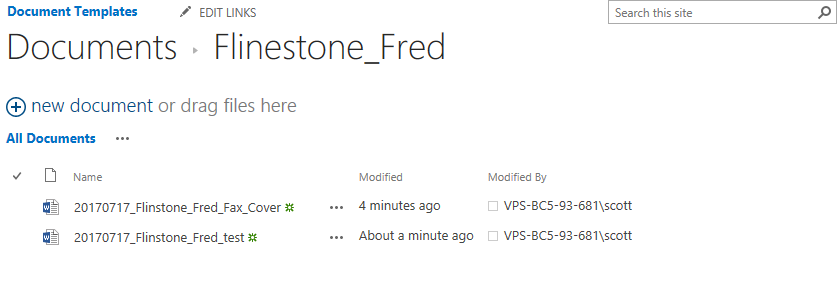
The Results in SharePoint!

Documents created in the correct folder with all of the {tags} replaced with your Client data.
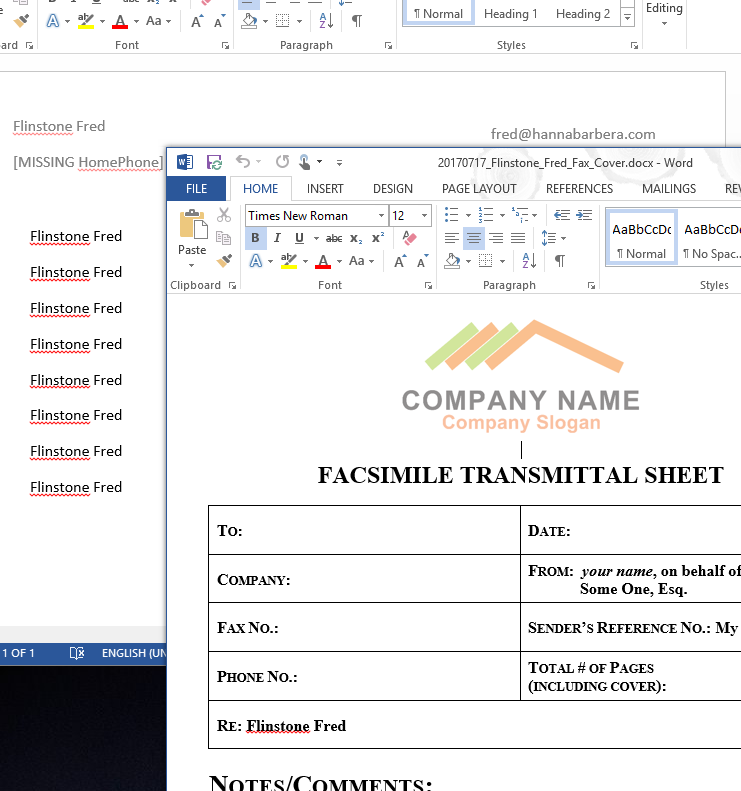
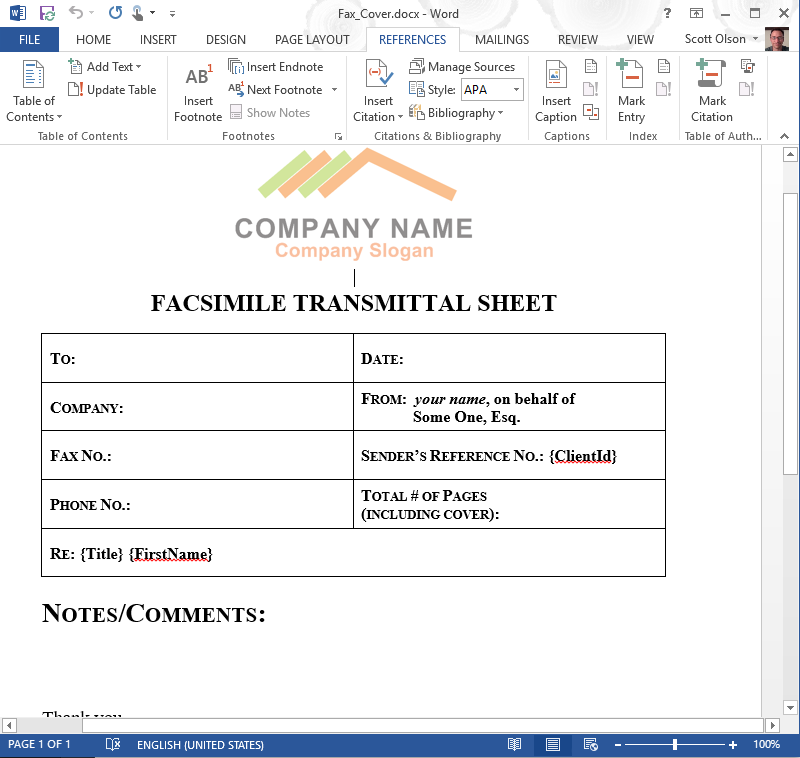
The Resulting Documents!

Your templates can contain images and when the SharePoint list does not contain information for a {tag} it is marked as 'MISSING'.

Your Templates

Simply put the {tags} in the documnent where you would like your Client fields to appear.

Installation Instructions

If you choose to go it alone..

  • Self Installation Instructions

    • Create a Document Library called "Document Templates"
      • The name must be exact and you can change it to "Document Templates" after it is created with a different name
      • Store your document Templates in "Document Templates" (samples templates have been included) 
    • Create a "Contacts" list called "Clients"
      • Add a "Hyperlink or Picture" column called "DocumentFolder"
        • See highlighted line in "Client list settings.PNG"
        • When you add your Clients to this list create a folder in "Documents" (a.k.a. "Shared Documents") and add the url to the "DocumentFolder" field
          • Example: http://sp.vraxy.com/DocTemplates/Shared%20Documents/Flinestone_Fred
          • Paste the link in both "Type the Web address:" and "Type the description:" fields
        • This link will be the place where this customer's documents are stored
      • Create a view of "Contacts" called "AvailableForTagging"
        • Select all of the fields you want as available {tags} in your documents
        • Keep to simple fields (Text, DateTime, Choice,..)
    • Create a Document Library called "Scripts"
      • Copy all of the files from the zip and place them in the Scripts folder
      • Ensure your site users only have read access to this folder
    • Create a page
      • Add a Content Editor Web Part
      • Edit the properties of your new CEWP web part
        • Set the "Content Link" to "template-tool.js" (e.g.: Content Link: /DocTemplates/Scripts/template.js.min)
          • Where "DocTemplates" is the name of your sub-site
          • If you are on premises the Content Link should begin with "/sites"
        • Set the "Appearance > Chrome Type" to "None"
        • Click "Apply" or "OK"
        • Save your page

  • Typical Use Instructions

    • Select client who's data you want to use in conjuction with the templates in the "Client" dropdown
    • In the "Select the types of documents you wish to generate" section place a checkmark next to each template you want to use
    • Click the "Create" button

    • Notes:
      • Due to naming conventions you can only create one document per type each day. If you have the need to create multiple documents for a client in a given day please contact us for further customization
      • You'll get a notification each time a document is created
      • If a field hasn't been provided for a given Client you will see the field name with the work "MISSING" in the created document

  • Maintenance Instructions

    • [Optional] Click the link "Fields" to see the tags that you can use in your document templates
    • [Optional] Click the link "Values" to add/remove Clients or change information in Clients you have already added
    • [Optional] Click the link "[add/remove]" to add/remove the tags available in your document
      • Once the view "AvailableForTagging" view opens click "Modify this View" and check "Display" for each field you want to use and the save your changes
      • If you want to add a new field then go into "List Settings", add the field you want and the enable it as described in the previous bullet. A common mistake is to add the field but forget to choose it in the "AvailableForTagging" view.
    • [Optional] In Document Templates place MS Word documents with the tags you see when you click the "Fields" link
    • [Optional] Click the link next to "Client Folder" as a quick way to open the folder where documents are created for each client

  • Be Part
    Of Our
    Story!